
Hi everyone!
Quick reminder to head over to Scribble and Scrap Crafts if you'd like to save 10% on the Santoro Gorjuss and Mirabelle ranges. Just add the code SANTORO10 at checkout before 9pm Saturday (or they sell out) to get your discount.
********
Today we have a gorgeous flower tutorial for you by young Jill, the baby of the team.
These flowers are so pretty! Over to Jill.
********
Here is what you will need

Start by cutting into the centre of the doilies as in the following 2
picture. On the 3rd doily you will need to cut in one place from the
centre to the outside edge as this will make the folding easier.


Start to fold the doily with the smallest central hole and glue as in the next 2 pictures.


Next fold the next sized hole doily again as in the above pictures and
finally the one that has been cut down the width as in the picture
below.

Now you're going to glue the 3 layers together, I used the glue gel for
this as it is stronger than the photo glue used for the pleats. With
the 3rd layer (pic above) you may need to cut it to the desired length
once you have the layer as frilly as you would like it.Once glued it
should now look like this

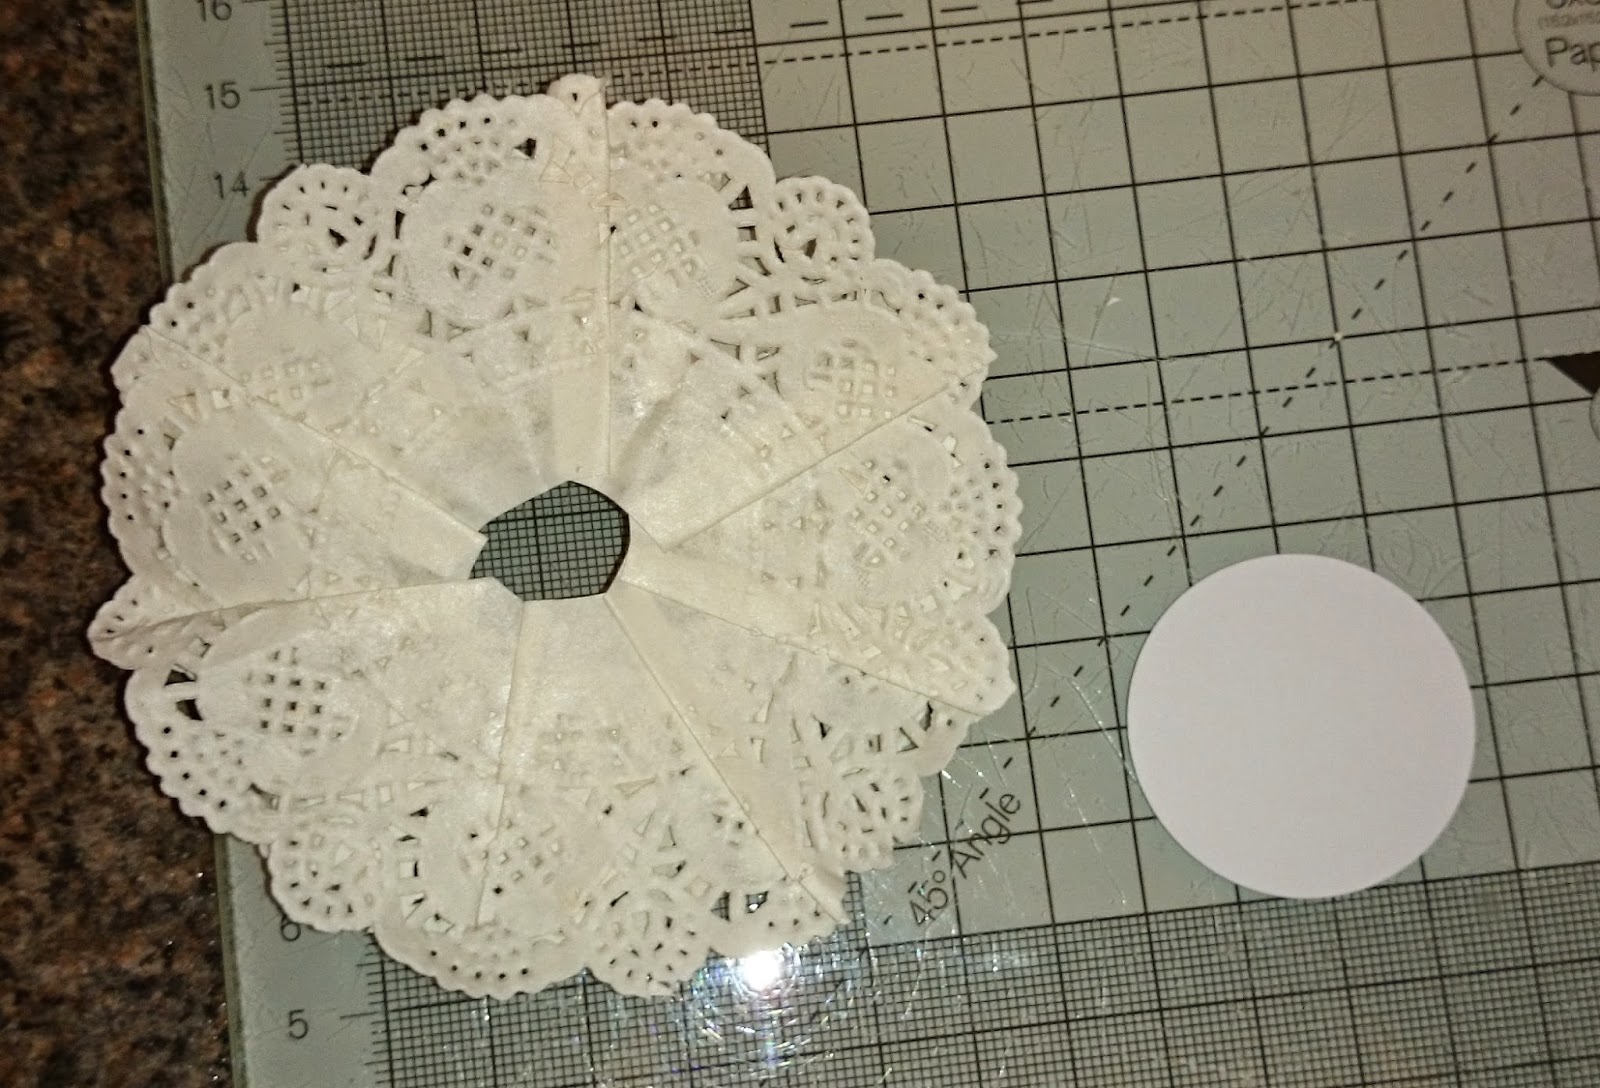
Next I punched out a circle from plain white card, you coul deasily just
cut a circle if you don't have a punch, you're not going to see it on
the finished flower so doesnt need to be perfect.
Add some glue gel to the underneath of the flower and then stick down
onto the circle. Now you're ready to glue on you're dazzler for the
centre or whatever embellishment you chose to use. Add a blob of glue
gel to the back of the dazzler and press down into the centre of the
flower.

So here is the finished flower

You could also tint the edges of the doily with distress inks before you
start the folding so they will co-ordinate with the project you are
using them for.
Hope you enjoyed my tutorial and would love to see your flowers!
Hope you enjoyed my tutorial and would love to see your flowers!
********
Thank you, Jill...it's a truly beautiful flower and I will be having a try of this one myself.
You will find various doilies and Dazzlers in the shop alongside other embellishments which would allow you to create your own flowers and put your own twist on them.
Go have a go! We'd love to see them.
Take care and happy crafting!
XX
Nice! Thank you for the tutorial!
ReplyDeleteThat's really pretty and I have doilies in my stash but never tried this. I expect you can vary the size too by folding it tighter over itself. What a great tut Jill. Pictures are great too.
ReplyDelete